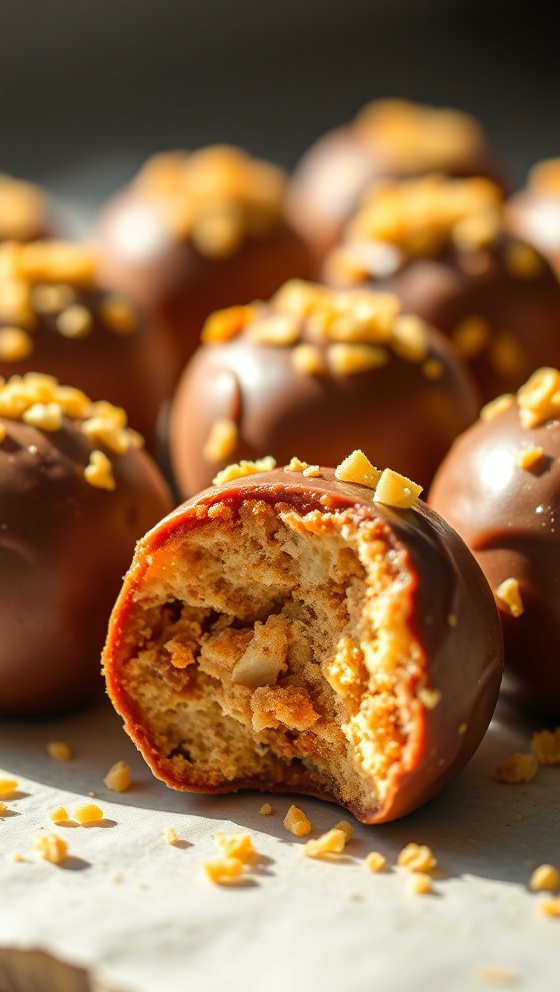
Butterfinger Fudge Balls
Introduction
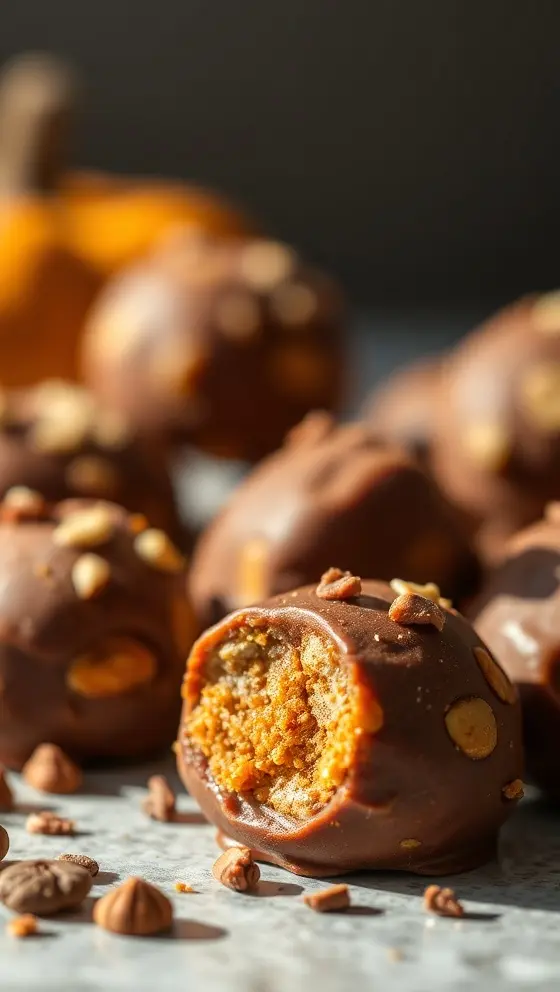
In the realm of delightful desserts, few treats can rival the rich, chocolatey, and buttery goodness of Butterfinger Fudge Balls. These luscious bites perfectly encapsulate the classic flavors of the popular candy bar while offering a unique twist that makes them an inviting option for dessert lovers. Whether you’re preparing for a gathering, a holiday, or simply seeking to indulge in a sweet craving, Butterfinger Fudge Balls are easy to whip up and guarantee satisfaction with each decadent mouthful. In this blog post, we will delve into the step-by-step process of creating these delectable treats that harmoniously blend the wonderful taste of Butterfinger with rich fudgy sweetness.
Ingredients List
To create your own Butterfinger Fudge Balls, gather the following ingredients:
– 1 cup of crushed Butterfinger candy bars
– 1 cup of semisweet chocolate chips
– 1 can (14 oz) of sweetened condensed milk
– 2 cups of graham cracker crumbs
– ½ cup of butter, softened
– 1 teaspoon of vanilla extract
– Pinch of salt for taste
– Additional melted chocolate for coating (optional)
This combination of ingredients promises a rich, flavor-packed treat that embodies all the beloved characteristics of the Butterfinger candy.
Timing
Before you dive into the recipe, it’s helpful to know the total time commitment. Here’s a quick breakdown:
– Preparation time: 15 minutes
– Refrigeration time: 1 hour
– Total time: 1 hour and 15 minutes
With minimal prep time and a short chilling period, you’ll be enjoying your Butterfinger Fudge Balls in no time.
Step-by-Step Instructions
Follow these easy steps to create your Butterfinger Fudge Balls:
1. Start by crushing the Butterfingers in a resealable plastic bag until they reach crumbly pieces. This texture will help incorporate the Butterfinger flavor throughout the fudge.
2. In a medium saucepan, over low heat, combine the semisweet chocolate chips and sweetened condensed milk. Stir constantly until the chocolate is melted and the mixture is smooth. This step allows the sweetness of the condensed milk to complement the chocolate perfectly.
3. Once melted, remove the saucepan from heat and add in the crushed Butterfinger pieces, graham cracker crumbs, softened butter, vanilla extract, and a pinch of salt. Mix until all components are thoroughly combined, ensuring each bite is bursting with that irresistible Butterfinger flavor.
4. Grease a baking dish (approximately 8×8 inches) and pour the fudgy mixture into it, spreading it evenly using a spatula. To get a nice, flat surface, you can also use your fingers to press down gently.
5. Cover the dish with plastic wrap and refrigerate for at least one hour. This cooling process helps firm up the fudge, making it easier to cut.
6. Once chilled, remove the fudge from the dish and cut it into small bite-sized squares or roll them into balls for a fun, poppable treat.
7. For an extra indulgent touch, consider dipping the fudge balls into melted chocolate and allowing them to harden on a wire rack.
By following these straightforward instructions, you’ll create irresistible Butterfinger Fudge Balls that will surely delight friends, family, and yourself alike.
Nutritional Information
Understanding the nutritional aspects of your creations can help keep a balanced approach to indulgence. Here’s a breakdown (per serving based on a recipe yielding about 20 servings):
– Calories: 180
– Total Fat: 9g
– Saturated Fat: 5g
– Sodium: 55mg
– Total Carbohydrates: 25g
– Dietary Fiber: 1g
– Sugars: 16g
– Protein: 2g
These Butterfinger Fudge Balls are undeniably rich, but they are made for special occasions and moments of relaxation!
Tips
To enhance your experience while preparing these Butterfinger Fudge Balls, consider the following tips:
– Use high-quality chocolate chips for a smoother, richer fudge flavor.
– Allow the Butterfinger crust to sit in the refrigerator overnight for an even firmer and more cohesive texture.
– Experiment with toppings! Try drizzling caramel or white chocolate over the fudge for a visually stunning and flavor-rich finish.
– For a crunchier texture, add chopped nuts or pretzels along with the Butterfinger pieces.
Implementing these tips can elevate your baking experience and the enjoyment your guests will experience when tasting these delightful treats.
Alternative Methods
If you prefer alternatives to the Butterfinger Fudge Balls recipe, consider these variations:
– Peanut Butter Fudge Balls: Substitute crushed Butterfinger for peanut butter chips and add chunks of toffee for a slightly healthier version that doesn’t skimp on that rich, nutty flavor.
– Vegan Version: Use dairy-free chocolate chips and coconut cream instead of sweetened condensed milk for a delicious vegan twist on these fudge balls.
– Flavored Variations: Consider incorporating flavors like coconut extract, mint, or orange zest for a unique spin on Butterfinger Fudge Balls. Additional textural contrasts can be achieved by adding flakes or specialty toppings.
Exploring these alternative methods introduces a world of possibility that caters to various dietary preferences and enhances the versatility of the original recipe.
Common Mistakes to Avoid
Avoiding pitfalls while preparing these Butterfinger Fudge Balls is essential to achieving the desired texture and flavor. Here are common mistakes to watch out for:
– Not Crushing the Butterfingers Properly: Failing to adequately crush the Butterfingers can lead to uneven flavor distribution in the fudge bars.
– Overheating the Chocolate: Melting chocolate over high heat can result in a gritty or burned texture. Always stick to low heat and stir consistently.
– Insufficient Chilling Time: If you don’t allow enough time for the fudge to chill, it might not hold together properly when you try to cut or roll it.
– Skipping the Salt: A small pinch of salt can enhance the sweetness of dessert. Don’t neglect adding it to your mixture!
By avoiding these common mistakes, you can ensure that your Butterfinger Fudge Balls come out perfectly every single time.
Conclusion
In conclusion, Butterfinger Fudge Balls embody the essence of indulgent desserts while allowing room for creativity and personalization. With their rich chocolate, creamy texture, and delightful crunch, these fudge bites are a treat that satisfies sweet cravings and elevates any occasion. As you experiment with this recipe, remember to leverage the provided tips and variations for a customized culinary experience. Don’t forget to revisit my website for more delectable recipes and cooking inspirations that will keep your kitchen adventures exciting and flavorful. Happy cooking, and enjoy every bit of your homemade Butterfinger Fudge Balls!
FAQs
Q: Can I use other types of chocolate besides semisweet?
A: Absolutely! You can use dark, milk, or white chocolate depending on your taste preference. Each variety will lend a different flavor to your fudge balls.
Q: How should I store the Butterfinger Fudge Balls?
A: Store them in an airtight container in the refrigerator for up to two weeks for optimal freshness.
Q: Can I freeze the Butterfinger Fudge Balls?
A: Yes, these fudge balls can be frozen. Just ensure they are in a freezer-safe container, and they can last for up to three months in the freezer.
Q: What can I serve with the Butterfinger Fudge Balls?
A: They pair wonderfully with coffee, tea, or a scoop of vanilla ice cream for added indulgence.
Q: How do I know when the fudge balls are set?
A: Once they feel firm to the touch and maintain their shape when gently pressed, they are set and ready to enjoy!
Butterfinger Fudge Balls
Ingredients
- 1 cup Butterfinger candy bars, crushed
- 1 cup chocolate chips
- 1 cup sweetened condensed milk
- 1 teaspoon vanilla extract
- 1 cup powdered sugar
Instructions
- In a mixing bowl, combine crushed Butterfinger bars, chocolate chips, sweetened condensed milk, and vanilla extract.
- Mix until well combined.
- Gradually add powdered sugar until the mixture is thick and moldable.
- Form the mixture into small balls and place them on a baking sheet lined with parchment paper.
- Chill in the refrigerator for at least 30 minutes before serving.
Nutrition Information
- Calories: 120 kcal
- Protein: 2g